Slow-loading sites frustrate visitors, increase bounce rates, and damage search rankings. WordPress websites that fail to load content in a timely manner have users abandon them, and conversions are harmed. Poor performance can also harm credibility and revenue.
Without an effective WordPress caching strategy, your site may be unable to handle high traffic spikes, causing downtime. Fortunately, WordPress caching methods can improve website speed and user experience. Caching content and reducing server load speeds up loading and makes navigation easier with caching. So, let’s get started!
What is Caching?
Caching is a technique of storing data that is used repeatedly for a short duration so that future requests for the same information can be served in a timely manner. Instead of constantly regenerating dynamic content, caching provides a way for WordPress to deliver cached content. With caching you can improve WordPress website speed and reduce server load.
How Caching Works?
- Initial Request: When the page is accessed the first time, the request gets processed by the server, pulls data from the databases or the files if required, and presents the page. This could be resource-intensive and time-consuming.
- Caching the Cache: After the initial request, a copy of the presented page or the important data is stored in a cache. The cache can be stored on the server (server-side caching) or on the user’s browser (client-side caching).
- Future Requests: When a different or same user requests the same page, the browser or server searches for a cached version. If so, the cached version is returned instead of recalculating the request, significantly speeding up delivery time.
Since we now know what is caching and how it works, let’s learn about the types of WordPress caching in the next section. It will help you to learn about what strategies to implement to optimize your website.
Types of Caching in WordPress

WordPress caching enhances the performance of websites by saving frequently accessed data. There are several ways of caching that enhance site features from database queries to content delivery. Below are the main types of caching used in WordPress.
Object Caching
Object caching stores repeated queries to the database, reducing multiple fetches of the same information. WordPress itself has an object cache that works on per page load, but persistent object caching (like Redis, and Memcached) saves data between consecutive requests. It is useful in dynamic websites where there are constant database interactions.
Page Caching
Page caching caches a static HTML copy of a page and serves it to visitors without PHP processing. Server load is reduced and the response time of websites is sped up, especially for high-traffic websites. WP Rocket and W3 Total Cache are the two most used plugins that effectively implement page caching.
Browser Caching
Browser caching enables users’ browsers to cache static resources such as images, CSS, and JavaScript locally. When the visitor comes back to the website, the browser will fetch the resources from local storage rather than re-downloading them. Configuring the expiration headers for caching in the .htaccess file or plugins optimizes browser caching.
Opcode Caching
Opcode caching pre-compiles PHP code and keeps it in memory. It minimizes recompiling them for each request. This accelerates execution times, as WordPress is very dependent on PHP for dynamic content generation. OPcache, a native PHP caching engine, greatly improves server efficiency.
CDN Caching
CDN (Content Delivery Network) caching distributes static assets like images, stylesheets, and scripts across an array of global servers. If a user visits a site, the CDN serves content from the closest server, reducing latency and improving load times. Popular CDNs like Cloudflare and StackPath enhance WordPress performance by reducing server response times.
Benefits of Using WordPress Caching

Having caching in WordPress enhances page speed and performance through reduced server loading. It yields a better user experience and makes the site more efficient overall. The most significant benefits of having caching in WordPress are discussed below.
- Faster Page Load Times: Caching stores pre-generated data, facilitating fast page loading without having to process requests repeatedly. It optimizes the user experience and reduces bounce rates. Quicker loading also aids in higher engagement and conversion.
- Reduced Server Load: By serving cached content, caching minimizes database queries and PHP executions to a bare minimum. That minimizes server load, so crashes do not occur during traffic spikes. Reduced server resource use also implies improved hosting efficiency.
- Improved SEO Rankings: Web page speed is a major search engine ranking factor. Caching web pages are loaded faster, which improves Core Web Vitals and search engine ranking. A cache-optimized website can get more organic traffic.
- Less Bandwidth Usage: Caching reduces the transfer of large data on repeated instances. Browser cache and CDN cache are used to lower the bandwidth usage. This results in cost savings for high-traffic sites or in situations where there are tight hosting resources.
- Better User Experience: Users need websites to load fast, and caching enables you to give them a smooth experience. More page loads mean more user satisfaction and interaction. A seamless surfing experience will encourage users to spend more time on the website and interact more with it.
All these benefits are the reason why you implement caching on your website. But how exactly do you implement caching on WordPress? Let’s discover!
How to Set Up Caching in WordPress?

Setting up caching in WordPress enhances site performance, speed, and server efficiency. The following are the primary steps to set up different types of caching for a WordPress site. Follow these steps to set up caching and optimize your site.
1. Install a Caching Plugin
A cache plugin offers automatic caching and website performance enhancement. WP Rocket is a premium cache plugin with a simple installation and premium caching features.
- Step 1: Download and purchase WP Rocket from its official website.
- Step 2: Navigate to your WordPress dashboard and click Plugins > Add New.
- Step 3: Click Upload Plugin, select the WP Rocket ZIP file, and install it.
- Step 4: Activate WP Rocket, and it will enable page caching by default.
- Step 5: Adjust caching settings from Settings > WP Rocket to further optimize.
2. Activate Browser Caching
Browser caching stores static resources (CSS, JS, images) in the visitor’s browser for fast loading on future visits. This reduces repeated downloads and speeds up the website.
- Step 1: Go to Settings > WP Rocket > File Optimization.
- Step 2: Scroll down to the Static Files section and enable browser caching.
- Step 3: Save, and WP Rocket will automatically implement caching rules.
Browser caching can be enabled manually by adding the following code to your .htaccess file:
<IfModule mod_expires.c>
  ExpiresActive On
  ExpiresByType image/jpg "access plus 1 year"
  ExpiresByType image/jpeg "access plus 1 year"
  ExpiresByType image/gif "access plus 1 year"
  ExpiresByType image/png "access plus 1 year"
  ExpiresByType text/css "access plus 1 month"
  ExpiresByType text/javascript "access plus 1 month"
  ExpiresByType application/javascript "access plus 1 month"
  ExpiresByType application/x-javascript "access plus 1 month"
  ExpiresByType text/html "access plus 1 hour"
  ExpiresByType application/xhtml+xml "access plus 1 hour"
</IfModule>
3. Enable Object Caching (Redis/Memcached)
Object caching stores database query results in an effort to reduce load and make things more efficient. Redis and Memcached are popular object caching tools.
- Step 1: Install the Redis Object Cache or Memcached plugin from the WordPress plugin repository.
- Step 2: Activate the plugin and go to Settings > Redis Object Cache.
- Step 3: Enable Object Cache by clicking on it, and Redis/Memcached will start optimizing database queries.
4. Use a CDN for Caching
A Content Delivery Network (CDN) holds and distributes web content on servers across the world. This speeds up page loading for users across different locations.
- Step 1: Sign up with a CDN provider like Cloudflare, KeyCDN, or StackPath.
- Step 2: Configure as per the provider’s instructions to add your site to the CDN network.
- Step 3: Change DNS settings to forward to the CDN network.
- Step 4: Configure caching and performance settings in the CDN control panel.
- Step 5: Purge the cache and check website speed improvements.
5. Clear and Manage Cache
Regularly clearing the cache ensures that updated content is displayed correctly. Cached files can sometimes cause conflicts after site updates.
- Step 1: Go to Settings > WP Rocket in the WordPress dashboard.
- Step 2: Click Clear Cache to remove stored cached files.
- Step 3: If using a CDN, go to the CDN settings and purge the cache there as well.
- Step 4: For Redis or Memcached users, flush the object cache from Settings > Redis Object Cache > Flush Cache.
By following these caching steps, you can optimize WordPress site performance and speed. Combining page caching, browser caching, object caching, and CDN caching ensures efficient resource utilization. Regularly review cache settings and flush caches for best site performance.
Best WordPress Caching Plugins

Using a caching plugin is one of the easiest ways to improve WordPress performance and reduce page load times. Below are some of the best WordPress caching plugins you can use.
1. WP Rocket
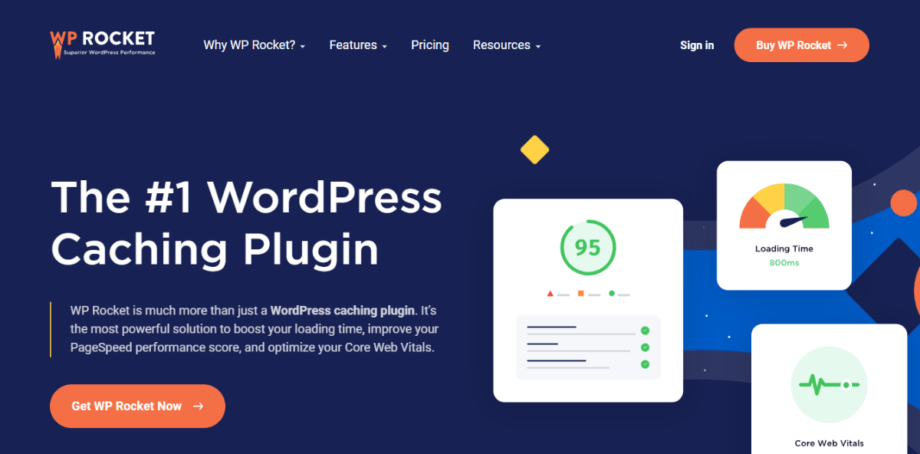
WP Rocket is a premium caching plugin that offers an easy-to-use interface with powerful performance optimizations. It includes built-in caching, lazy loading, and database optimization features.
Key Features:
- One-click setup with automatic caching activation.
- Built-in lazy loading for images and videos.
- Database optimization to remove unnecessary files.
- GZIP compression and minification for CSS, HTML, and JavaScript.
- Supports advanced caching mechanisms like preloading and mobile cache.
Ideal For: Beginners and advanced users looking for an all-in-one premium caching solution with minimal setup.
2. W3 Total Cache
W3 Total Cache is a highly customizable caching plugin that improves site speed with multiple caching methods and CDN integration. It offers detailed configuration options for advanced users.

Key Features:
- Page, object, database, and browser caching support.
- Minifies HTML, CSS, and JavaScript to reduce file sizes.
- CDN integration to enhance content delivery speed.
- Supports fragment caching for dynamic content.
- AMP (Accelerated Mobile Pages) and SSL support for secure sites.
Ideal For: Developers and advanced users who need a highly configurable caching solution with extensive settings.
3. WP-Optimize
WP-Optimize is an all-in-one plugin that combines caching, database cleanup, and image compression for enhanced website performance. It helps reduce bloat and improve loading times.

Key Features:
- Automatic database cleanup to remove spam comments and post revisions.
- Built-in page caching for faster content delivery.
- GZIP compression to reduce file sizes for quicker load times.
- Image compression and optimization for better site speed.
- Schedule automatic optimizations to keep your site running smoothly.
Ideal For: Website owners looking for an easy-to-use caching plugin with additional database and image optimization features.
4. WP Super Cache
WP Super Cache is a free and simple caching plugin developed by Automattic, offering static HTML page caching for improved performance. It’s lightweight and easy to set up.

Key Features:
- Generates static HTML files to reduce PHP processing.
- Three caching modes: Simple, Expert, and WP-Cache for flexibility.
- Preloading option to generate cached pages before visitors arrive.
- Garbage collection feature to automatically clean up expired cache files.
- Supports CDN integration to distribute content globally.
Ideal For: Users who want a free and reliable caching solution with minimal configuration.
5. Cache Enabler
Cache Enabler is a lightweight caching plugin by KeyCDN that generates static HTML files to speed up WordPress websites without unnecessary bloat.

Key Features:
- Fast and simple disk-based caching mechanism.
- Supports WebP image format without JavaScript dependencies.
- Automatic cache clearing when content is updated.
- Minimal settings for quick setup and performance improvement.
- Works well with lightweight themes and plugins for optimal speed.
Ideal For: Users who need a simple, no-frills caching solution with WebP image support.
Conclusion

Choosing the right WordPress caching plugin depends on your requirements and needs. To select the best one consider trying out features of each plugin. It will help you pick the right plugin for implementing caching in WordPress.
A properly implemented caching plan can greatly enhance website speed, increase user satisfaction, and decrease server load. Object caching, page caching, browser caching, OPcode caching, and CDN caching are some of the techniques used to deliver content more quickly by reducing redundant processing.
Selecting the appropriate caching plugin be it WP Rocket for ease of use or W3 Total Cache for flexibility optimizes your website. Increased load times not only keep users active but also enhance SEO rankings and conversion rates. An optimized site decreases downtime and optimizes overall performance that’s why you should implement caching for your WordPress site.


