Your PC is a storehouse of all kinds of files and processes. Over a period of using it, you may encounter storage-related issues, even if your computer has large storage space. If that’s you, you are not alone.
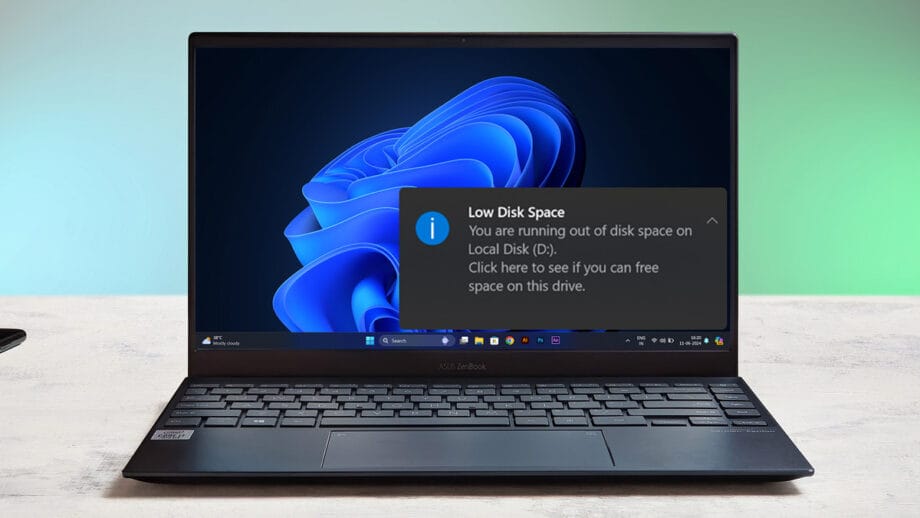
In many cases, users come across “storage full” errors or are unable to store files on their drives because of low disk space. The diminishing storage doesn’t just prevent storing new files, it also starts taking a toll on the overall functionality of your PC.
How to Know that Your PC is Running Out of Space?
There are some evident signs that indicate that you should optimize your PC storage. Here are some of the common ones:
- Drives Show Red-Marked Bars: Head to your File Explorer, if you see red-marked bars under the drives on your PC, it might be the time that you free up storage space.
- Inability to Run Multiple Programs: If the applications you are running on your PC are not resource-heavy they should run smoothly. However, if that’s not the case, you may want to check and clean up space on your Windows PC.
- Files Open with lag: One of the common signs of a PC running out of storage is files opening up slowly. While this may be an indication of other issues, you can start by freeing up some hard drive space to fix it.
- Difficulties in installing updates: It goes without saying that updates are very important for your Windows computer. But, if you are unable to fetch updates, it could be a sign that you need to clean your Windows PC.

To save your computer from running out of space, we have curated a list of some of the best ways you can clean your Windows PC.
Best Ways to Free Up Disk Space
Here are some of the best ways to avoid the “Storage full” error and the like, and in the process optimize PC storage:
Solution 1: Use Disk Cleanup
Your Windows has an inbuilt function called “Disk Cleanup” to get rid of unwanted data and temporary files. And, it also lets you select the drive as well. Here is how you can optimize PC storage space using Disk Cleanup:
Step 1:
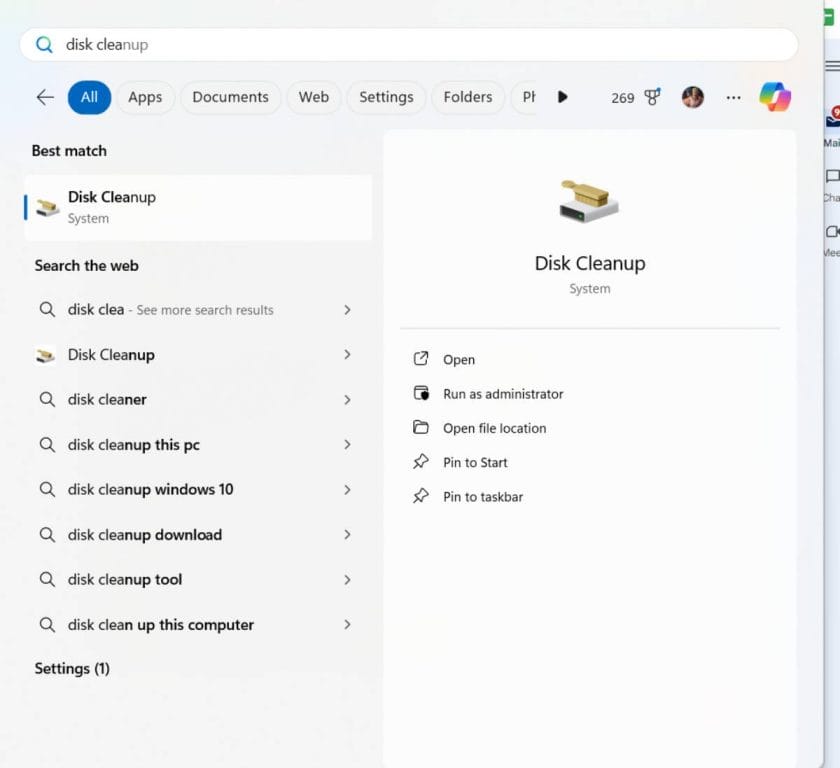
In the Windows search bar, type Disk Cleanup. Click on Run as administrator from the right-hand side.
Step 2:
Select the drive you want to clean and click on OK.
Step 3:
When the Disk Cleanup window opens, select the items you want to remove by clicking on the checkboxes next to the file name.
Step 4:
Click on OK to begin the deleting process.
Step 5:
Once the deletion process is complete, head back to your File Explorer, select the drive that you have cleaned up, and hit the refresh button.
Solution 2: Delete Duplicates
Duplicate files pile up as you use your PC for a longer period. With several versions of files being stored, it is difficult to find the exact files to remove. In such an event, you can’t just go about deleting every other duplicate as that would consume a lot of time. In doing that, you also might end up deleting important files as well.
Take duplicate photos, for instance, duplicate photos. If you use your PC as the final storehouse of photos, chances are your drive is warmed with duplicates of all kinds. Broadly speaking, there might be similar-looking as well as exact duplicates. The best bet to remove duplicate photos and free up storage is to use a tool Duplicate Photos Fixer Pro.
It scans all kinds of drives for duplicate photos, lets you filter out duplicates based on various filters, and even lets you auto-mark duplicates. By auto-marking duplicates, one duplicate photo is marked in each group. Hence, you can successfully remove duplicate images safely.
Solution 3: Remove The Apps You No Longer Need
The goal here is to remove all the apps that you no longer use and that are just taking up storage. Here the aim is also to remove the files associated with the apps. To uninstall an app completely to free up disk space on your computer:
Step 1:
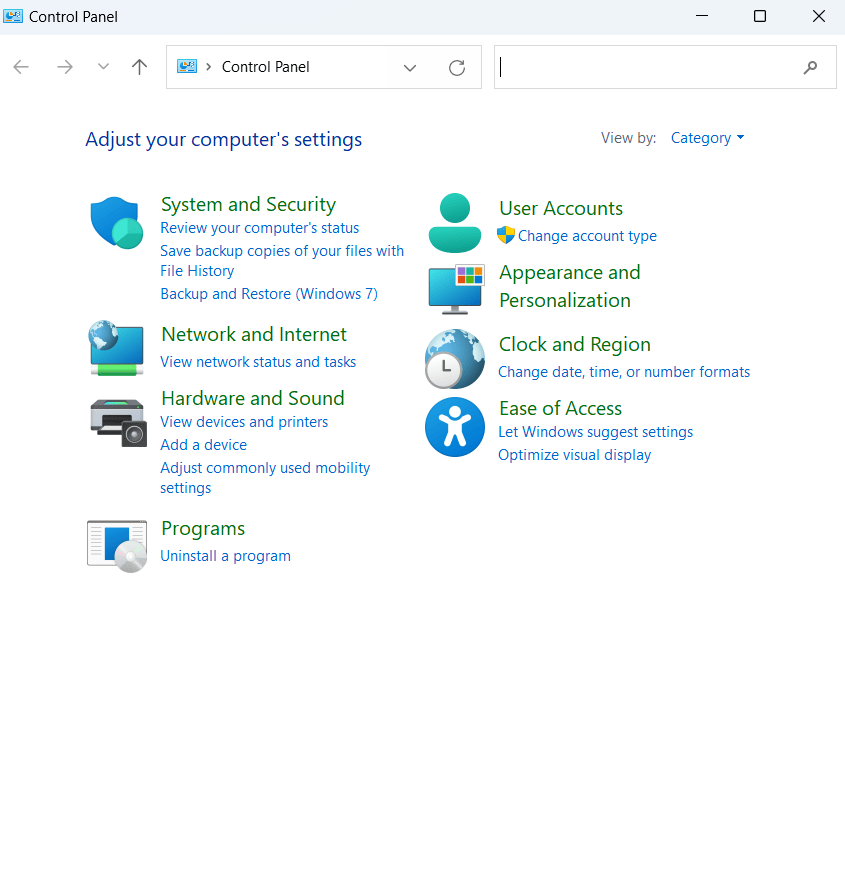
In the Windows search bar, type Control Panel and select Open from the right-hand side.
Step 2:
Click on the dropdown next to View by, and select Category.
Step 3:
Under Programs, click on Uninstall a program.
Step 4:
Locate the app that you no longer use, select it, and click on the Uninstall button from the top. Repeat this process with all the apps that you wish to get rid of.
If there is an app that you wish to remove and if you can’t see it in the Control Panel, chances are that you have downloaded it from the Microsoft Store. To remove such apps, search for the name of the app in the Windows search bar, and click on the Uninstall button from the right-hand side.
The Application Removal is Still Incomplete Without These Points
If you think just removing an app from the Control Panel is sufficient, it isn’t. Even after being uninstalled, apps leave files that fill up your drive’s storage. To get rid of such files, there are multiple ways:
Way 1: Go to the file location and delete the remnants
Step 1: Open your File Explorer.
Step 2: Head to C:\Program Files (x86) Here you will find most of your applications and you might even be surprised that even after deleting them from the Control Panel, they are still showing here.
Step 3: Click on the application folder and delete it using the Shift + Delete operation.
Way 2: Use A Third Party Tool
There are various uninstaller software that are capable of deleting multiple apps at once. They also make sure that no remaining files are there on your PC. Some of the names include Wise Program Uninstaller, IObit Uninstaller, Revo Uninstaller, Advanced System Optimizer, and others.
Solution 4: Clean Your Downloads Folder
This is in addition to the above solution. Once we have removed applications, we often forget to clean up our download folders. To free up disk space, you can either delete the setup files of the applications you have removed. Or, if need be, you can move the files to a drive that has sufficient storage space.
Solution 5: Enable Storage Sense
Did you know that your Windows PC has a feature that allows you to free up space automatically? It lets you get rid of items in your Recycle Bin and helps get rid of temporary files. It especially comes into action whenever your disk space is low. Here are the steps to run Storage Sense to avoid storage full errors and the like:
Step 1:
In the Windows search bar, type Storage.
Step 2:
From the right-hand side, under Storage settings, click on Open.
Step 3:
Under Storage Management, you will see the Storage Sense option.
Step 4:
Click on the arrow key next to Storage Sense, and choose your desired settings.
For instance, you can choose:
- When you want to run Storage Sense.
- When you want to clear up the Recycle Bin, and
- When the Storage Sense should delete files in the Downloads folder.
Solution 6: Move Files to the Cloud
Saving files to the cloud isn’t just a way to free up storage if your PC is running out of space, but it also acts as a backup. Plus, you can access these files from anywhere. This means you won’t have to give an excuse for not having your desktop or laptop.
Talking of the price, almost all cloud storage mediums offer some free storage space before asking you to sign up for the premium variants where you get more storage. Some notable names include Google Drive, Microsoft OneDrive, Dropbox, iCloud, and many others.
Solution 7: Use an External Hard Drive to Save Personal Files
Here’s another great functionality on your computer that can help you save storage space. You can automatically transfer files to an external storage drive. To explain this a little better, let us suppose that you often download large files such as software, movies, etc. Before you download such large files, follow these steps:
Step 1:
Connect an external hard drive to your computer.
Step 2:
Go to Settings.
Step 3:
Click on System and select Storage from the right-hand side.
Step 4:
Under Storage Management, click on Advanced storage settings, and select Where new content is saved.
Step 5:
In the next window, you can choose where you want to save your apps, music, documents, videos, pictures, maps, etc.
Solution 8: Shut Down Unnecessary Processes
It’s not just the files or applications that fill up storage space. There are times when there are several processes that run in the background and they take up huge memory space. To free up memory, you can select the processes that you don’t want to run and close them. To do that:
Step 1:
Open the Task Manager using Shift + Ctrl + Esc.
Step 2:
Locate the processes that are taking up the maximum memory. For this focus on the Memory column, and see the amount of memory consumed next to a process.
Step 3:
If there is a process that is running for no reason, click on it, and click on End task from the top.
Clean Your Windows PC for Better
Here’s a word of wisdom – cleaning up Windows computers should be a part of your regular workflow. Even if not on a daily basis, once in a while check your PC for redundant data – unwanted large files, applications/ processes that you don’t use, duplicate files, etc. Trust us, by freeing up disk space regularly, your PC will breathe a sigh of relief.
If you found value in this post, do let us know in the comments section below. Also, do share with us your ways of how you clean your PC.


