On downloading videos or accessing them over the internet, you might find various watermarks on them. These are added by the video owners or distributors as a trademark to state and secure their ownership. At times it can be a way to expand their reach to widen their customer base.
The placement of the watermarks can, however, hinder the watching, enhancing, or formatting experiences. It can even hide important content from the video clip that you aspire to use for entertainment, commercial, or personal use.
Today, as every other video on the internet is watermarked, you must know some handy ways to remove them. This article will guide you through all the possible ways of removing a watermark!
Why Must You Remove A Watermark?

There are several reasons why you should consider removing a watermark from a video. Some of these are listed below.
Eliminating Old Watermark
There might be a video that you watermarked quite some time ago that you wish to reuse. However, when you aspire to remake/edit the video with your new watermark, you will need to remove the older watermark.
Refinishing Old Videos
As a convention, older videos were formatted with time and date stamp at the lower corners of the video. While editing such videos, you might require to clean up these watermarked and stamped areas too. Thus, you will require a watermark remover here as well.
Full-fledged Experimenting
While experimenting with new tools and software, you might find watermarks to hinder video quality and experience. Also, some trial software adds watermarks to every frame to promote their company and services. Thus, you might have to remove the watermark from the video to enhance it.
Other Purposes
Other valid reasons for watermark elimination can be removing the channel logo, enhancing the video experience, and minimizing distraction. Also, at times watermarks might cover essential content; thus, removal might become necessary here.
Recommended for you: 11 Best Online Video Converters of 2020.
Types of Watermark on Video

To proceed with watermark removal, you must also know the types of watermarks that you might find. Below listed are some of the prominent watermarks that you can usually come across while editing.
1. Non-Transparent and Transparent Static Overlays
Static watermarks or channel logos that feature on every frame of the video are one of its examples. It can also include subtitles and other text types. At times, these can also cover portions that make patching a necessity after their removal.
2. Date and Time Watermarks
In older videos, date and time watermarks are quite prominent, with a recording indicator constantly blinking during streaming. While they were commonly used back then, today, they are nothing but pesky and distractive.
How to Remove the Watermark from Videos?

You can choose the type of removal method, depending on the type of watermark and its positioning. To decide for yourself which method will suit you the best, read on!
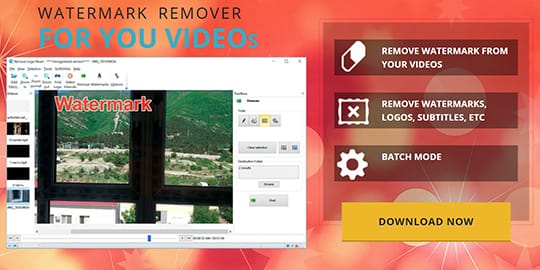
Note: For this article, we have used the software called WatermarkRemover. You can download, install, and use this tool on your computer. They have also an option for online editing that you can try.
1. Cropping the Watermark
For a video with a watermark located at one of the corners, cropping can be the most suitable watermark removal method. Especially if the watermark is positioned on a border or near the frame’s extremes, cropping can come in handy.

A powerful video watermark remover can work well with retaining the quality and provide a user-friendly interface. This can be useful when you are aiming to omit subtitles, border texts, and logos too.
To crop a video for watermark removal, follow the steps listed below.
Step 1: Import the video/videos to edit
Open the watermark remover software and import the video to edit it. Some tools also feature a “Load from DVD” option to add files directly from the DVD.
Step 2: Crop the unwanted watermarked area out
After your video file is open, you can select the option to edit and head to the “crop video” option. On the preview panel, you will find your video displayed whose end coordinates will be adjustable.
Step 3: Finalize the changes
You can drag the adjustment control points to exclude the area that you want to get rid of. Once the undesired area is out of the selected area, you can hit the ‘OK’ button to confirm your cropping adjustments.
You can also select multiple videos and apply the same editing feature to all the videos simultaneously. Lastly, you must export the video and exit.
The only downside of cropping is that, along with the watermark, the excluded area also gets eliminated. Thus, some parts of the video will be lost in the process.
You may like: Corporate Video Content Crafting 101 – Video Marketing is Here to Stay so you Should Join the Move.
2. Blurring the Watermark
If the watermark lies in the video’s action area, which can’t be cropped, you can opt for the blur option. This will blur the watermark and make it illegible without distorting the video’s quality by carefully pixelating the area.
This option omits the loss of any frames or any part of the video, like in the case of cropping. You can easily adjust the blur that you need and add it to make the watermark less clear.

Follow the steps below to blur a watermark in the video.
Step1: Import the video to add it
Import the video you want to edit and open it in the watermark remover software/online tool. Once the video is open, select the edit option and click on the panel’s blur option.
Step 2: Adjust the blur
You will obtain a selection tool that you can use to highlight the watermarked area to be blurred. Further, you can select the blur type and level according to your requirement and adjust the options accordingly.
Step 3: Finalize the changes and export
Once the necessary changes are made, you can preview the video and export it for further use.
3. Mask the Watermark
Instead of blurring or cropping the video, you can also mask the watermarked area to conceal it. Even this option allows you to retain the video quality as you proceed to remove the watermark from video clips.
Also, you will be able to mask the watermark’s presence instead of just making it illegible. The video watermark remover online tool is designed to cover the watermarks efficiently and carefully.

Below listed are the steps for the same.
Step 1: Import the video and select the cover/mask element
Open the software/online tool and import your video to edit. Once the preview panel opens up, find the cover/mask option among the editing tools and select the element type.
Step 2: Select the right cover and position it correctly

Choose the most suitable masking element and place it onto the watermarked area. Next, adjust the element to mask the watermark properly and fit it well to the watermark’s shape and size.
Step 3: Preview and export the file
Once done, preview the file to check the changes made, save it and export it for use.
4. Replacing
When you have to add your watermark in place of the previously present watermark, replacing can be the right choice. This option saves you the time and effort required to remove/conceal the watermark and place your own separately.
Also, replacing the watermark prevents any damage to the quality and the frames. Using the latest watermark remover tools will allow you to utilize this advanced feature and make your task simpler.
Follow the steps listed below to replace the watermarks.
Step 1: Import the video and the new watermark
Open the watermark remover tool/software, import the video, and add the new watermark.
Step 2: Position the new watermark to replace
Go to the add watermark option and select the new watermark you want to add. As the new element appears on the preview panel, you can further adjust it with the control points and completely cover the existing watermark.
Step 3: Set the duration and save
You must make sure to set the watermark’s duration the same or more than the previous watermark. Once done, you can preview the video and then export it.
5. Removing the Watermark
As replacing limits, you can use a new watermark of the same dimensions, removing it can be considered here. This way, the watermark will be eradicated, and the rest of the image will be patched accordingly.
To do this, you must follow the steps as mentioned.
Step 1: Import the video
Firstly, open the software/online tool and import the video file to edit.
Step 2: Capture the watermark present
Once open, then you must select the option “find watermark” to let the system detect the logo/watermark. Or, you can select it manually too, and click on the ‘Remove’ button.

Step 3: Preview and export the file
Once done, you can check the video to preview the changes and then finally export the file. One of the downsides of this option is that the area’s automatic patching can, at times, be distorted.
You may also like: 10 Video Editing Software to Use from Beginners to Professionals.
Conclusion

There are various watermark remover tools and software available compliant to every operating system, like iOS, Windows, Android, etc. Also, you can find some great online editing tools for the purpose as well.
On the other hand, you must check the video format supported, the quality, size, and the features available before proceeding further. So, go on and find the right watermark remover tool to enhance your overall streaming experience!
This article is written by Hannes Jansen. A content editor and copywriter who graduated Magistrate degree from the University of the Incarnate Word. Challenged deep research to dig into any technical topic. He is giving and energetic, and never give up started the challenge. Known for creating great content about software and digital photography. Always Get 10% more than what is required on any job.


